Blueberry Muffins – a sweet treat from The Southern Water Tribe

There’s something about these blueberry muffins that can warm even the coldest Southern Water Tribe day.  Though these muffins are equally delicious on a hot day in the Fire Nation as well.


Ingredients:

  • 1 cup soymilk
  • 1 tsp vinegar (apple cider vinegar works best)
  • 1 3/4 cups flour
  • 2 tsp baking powder
  • 1/2 tsp baking soda
  • 1/4 tsp salt
  • 1/2 TBSP vanilla
  • 2/3 cup sugar
  • 1/3 cup canola oil
  • grated peel of one lemon.
  • 2 cups blueberries (frozen or fresh)


Lets Make some muffins! :

Pre-heat oven to 375.

Mix soymilk and apple cider vinegar in a medium bowl and set aside to curdle.

In a large bowl mix together flour, baking powder, baking soda, and salt.

IMG_20180524_181512

Add the vanilla, sugar, and canola oil to the curdled milk and stir well.

Using a zester or cheese grater, grate the entire peel of one lemon into the milk mixture.

IMG_20180524_182244

Pour the milk mixture into the bowl with the dry ingredients and stir well.  You want the batter to be runny.  If you feel it’s too liquidy, add up to a 1/4 cup more of flour, but always error on the side of runniness.  Too firm a batter will produce something more akin to biscuits than muffins.

IMG_20180524_182519

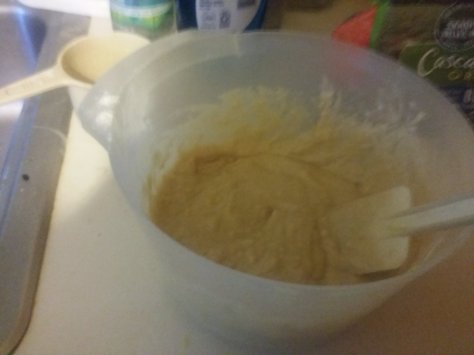
Stir the blueberries into the batter and mix well.  Frozen blueberries will turn the batter blue, fresh ones won’t.  When using fresh blueberries, usually one plastic carton is almost exactly the two cups you need to make these muffins.  Spoon the mixture into each section of a 12-section muffin tin.  Using cupcake cups makes the procedure a whole lot easier and I’d recommend using them.

Bake for 25 minutes, remove from oven, remove muffins from tin, and enjoy once they’re cool enough to eat.


Omashu Cheeseteak

Here’s a favorite comfort food of the citizens of Omashu, and no, it does not contain cabbage!  Vegan cheesesteak was a favorite dish of King Bumi as well.

Ingredients:

  • 1 package of seitan (strips work best, thought you can cut the cubed variety into strips with scissors)
  • 1 TBSP olive oil
  • 1/2 of a medium onion, cubed.
  • 1/2 medium green pepper, cubed
  • 4-6 medium white mushrooms, sliced
  • Daiya brand vegan “mozzarella” shreds
  • Seasonings:  Montreal Steak seasoning if you can  find it.  (I didn’t have any, so I used liquid smoke, soy sauce, seasoned salt, dill weed, and black pepper)
  • Buns or bakery rolls to make a sandwich.


Let’s do the Veggiebending!

Coat the bottom of a skillet with the olive oil.  Add the onion, green pepper, and mushrooms.  Cook over medium heat until the onions are transparent, and the mushrooms are soft and bendy.  (I started with a whole onion which was too much, and ended up removing some of the mixture and setting it aside for the next time I make cheesesteaks)

IMG_20160811_184838

Drain the excess liquid off of the seitan in a colander, then add the seitan to the skillet too.

IMG_20160811_184907

Stir the seitan in with the veggies in the skillet, coating the sietan in the veggie juices.  Add your spices and stir well again, ensuring the seitan and veggies are all well coated.

IMG_20160811_190114

Spread the contents of the skillet into a uniform layer.  Cover this layer with handfuls of Daiya vegan cheese, then cover the skillet and let it cook for a few minutes until the cheese has melted.

Once the cheese had melted, scoop the mixture in the skillet into your rolls or buns to make the sandwich.  For some added kick you can coat the buns or rolls with A1 sauce before adding the cheesesteak mixture.  Enjoy, and watch out for flying cabbages if you buy one of these from a street vendor in Omashu.

IMG_20160811_190942


Vedaburgers, for the hungry tunrbuckle bender.

A dish in honor of a legendary grappler, one they say was trained by Toph herself.  While “The Boulder” may have felt conflicted about fighting a young blind girl (and getting demolished by her disciple), he certainly wan’t conflicted in deciding this tofu was delicious.

Ingredients:

  • 1 block of tofu (pressed, or the super firm kind that doesn’t need to be pressed)
  • Soy Sauce
  • Cooking Wine
  • Seasoned Salt
  • Liquid Smoke
  • Nutritional Yeast


Lets’s get ready to rummmbbbbblleee!

Cut the tofu into 6 rectangles (cut into thirds along the spine, then once along the equator).

In a baking dish large enough to hold all 6 pieces of tofu, mix in soy sauce, liquid smoke, seasoned salt, and nutritional yeast.  Add very little water to this.  This is not only the marinade for the tofu, but will serve as the sauce once the tofu is cooked.  I never bother to measure the amounts out, I just pour in what I think works.  you can taste the marinade to make sure it’s to your liking too.


Marinate the tofu for 30 minutes on each side.


Fry the tofu rectangles on  a skillet until they all have a nice firm texture on one side.  Flip the tofu rectangles over and fry the other sides the same way.

Once the Tofu has been fried cripsy, put it on a plate and top with the remaining marinade.  It’s now ready to eat.

IMG_20160630_185117

Mister Lister’s Tofu Vindaloo – by Kryten

Ingredients:

  • 1 cup water
  • 1/4 cup white wine vinegar
  • 2 tsp cumin
  • 1 1/2 tsp powdered mustard seed
  • 1 tsp fenugreek (or curry powder in a pinch)
  • 1 tsp cardamom
  • 1 tsp black pepper
  • 1 tsp salt
  • 1 tsp coriander
  • 1 tsp cinnamon
  • 1 tsp brown sugar or molasses
  • 1/2 tsp cayenne pepper (Veggie Benders from the fire nation who prefer things spicier can use all the way up to 1 TBSP Cayenne, or 1/8 of a dried Scorpion or Ghost pepper)
  • 2 TBSP Olive Oil
  • 2 medium onions, diced
  • 3 tsp cold water
  • 10 cloves of garlic (yes ten, you read that right)
  • 1 inch cube of freshly peeled ginger
  • 12 – 16 oz of extra -firm tofu, cubed
  • 1 TBSP coriander
  • 1/2 tsp turmeric
  • 1-2 large potatoes, cut into cubes


Just because you’re a mechanoid, and 3 million years into deep space, that’s no excuse to let one’s veggie bending skills get rusty.  Mr. Lister, the Cat, and I traveled to the fire nation using the matter-transport paddles and found a restaurant serving this dish.  Legend has it Avatar Roku came up with this dish himself.  I managed to get the recipe from the owner, and now I shall share it with you.

Firstly, ensure that Miss Kochanski is out of the kitchen.  I’m still fuming over her treatment of the salad cream!

In a saucepan mix one cup of water with the vinegar and the first 10 dry ingredients.  Stir well.  Note from Mr. Cat: Omitting the water will leave you with a stylish red curry paste, suitable for any occasion.

IMG_20160225_130147


Add 1-2 TBSP of olive oil to a skillet, and brown the onions over medium heat, being careful not to burn them.  Put 3 TBSP of water into a food processor and add the browned onions.  Blend the onions and water until you have a smooth paste.  Add this paste to the saucepan containing the curry sauce and stir well.  Add the potatoes to this pan as well, stirring once more.  Simmer covered over low hear for 40 minutes.

Pre-fry the tofu in a wok with no oil.  Set the fired tofu aside in a bowl.  Rinse out your food processor well.  Blend the garlic and ginger in the food processor. until finely diced.  Add 1-2 TBSP Olive Oil to the wok and fry the garlic and ginger over medium heat until slightly browned.  Add the coriander and turmeric to the oil and watch it turn a lovely shade of yellow.  Stir in your friend tofu, and as the oil coats the tofu, notice that it turn this lovely shade of yellow as well.

Pour the entire contents of the wok into the saucepan with the curry sauce and potatoes after they’ve cooked for 40 minutes.  Stir the tofu mixture in well, cover, and simmer for another 20 minutes.  While this is cooking, re-label the white wine vinegar as “lager vinegar”, you know how Mr. Lister gets about wine!  When the potatoes are soft, the vindaloo is ready to serve.  Bon appetite!


Pumpkin Cake with Maple Glaze

Halloween is so much fun.  The costumes, the candy, and of course the pumpkins!  I enjoy carving intricate pumpkins, and Halloween gives me the chance to carve some of our beloved Avatars on the canvas that is a pumpkin.  I carved Avatar Aang the week of Halloween 2015, while I carved the Korra pumpkin the previous year, 2014.  A tip with Jack-o-Lanterns, ALWAYS keep them in the fridge after you carve them until you’re ready to put them out on Halloween night.

I’ve found a wonderful use for all that scraped pumpkin meat from your Jack-o-Lantern.   A pumpkin cake that’s an Earth Kingdom favorite, especially during the fall harvest in Omashu.  If you’re like me, and pumpkin pie is textured a bit too Water Tribe for your liking, you’ll love the spongy, delicate firmness of this cake, packed with the best flavors autumn has to offer.

Cake Ingredients:

  • 1 cup of Sugar or your substitute of choice (I like using Stevia powder for this)
  • 2 1/2 cups flour
  • 1 tsp baking soda
  • 1 tsp baking powder
  • 1 tsp cinnamon
  • 1/2 tsp salt
  • 1/2 tsp ground cloves
  • 2 cups of raw pumpkin pieces, packed firmly (I used scrapings and chunks from Jack-o-Lanterns I carved)  You could also use a can of pureed pumpkin and skip the cooking steps, as canned pumpkin is already cooked.
  • 1/2 cup canola oil
  • 1/2 cup maple syrup (do yourself a favor and use 100% REAL Maple Syrup)

Let’s make the cake!

Preheat oven to 375.

Start by putting the raw pumpkin into a saucepan and filling the pan with enough water to cover all of the pumpkin.  Bring the pot to a boil, then cover and simmer for 15 minutes.

While your pumpkin is boiling, mix all of the dry ingredients in a large mixing bowl.

When the pumpkin has finished cooking, drain the pumpkin in a colander (drainer).  I used the back of a cup-measure to push a lot of the excess water out.  When the water coming out of the drainer turns from clear to orange, you can stop draining.

Put the cooked, drained pumpkin into a food processor.  Add the canola oil and maple syrup, blending for 1-2 minutes, until the entire mixture is smooth.  Now let’s make the batter!

Create a well in your dry-mixture and pour the contents of the food processor in.  Stir well until fully blended.  The texture will be paste-like.  Firmer than typical cake batter, but not as firm as bread dough.  Scrape the batter into a greased pie pan.  The round one I used worked fine, but I’m sure square and rectangular pans work just as well.  Bake for 30 minutes.

While the cake bakes in the oven, let’s make the glaze!

Glaze Ingredients:

  • 1/8 cup confectioner’s (powdered) sugar
  • 1/8 cup maple syrup
  • 2 TBSP soy milk

IMG_20151108_141659

Stir all the glaze ingredients together in a small bowl.  As you can see here, I like to store the glaze in the fridge as it thickens over time.  You can freeze it if you want more of an icing texture than a glaze.

The cake will rise nicely as it bakes.  When the cake is done, instead of glazing the whole cake, I prefer glazing each individual piece before I eat it.  Enjoy.

Dahl: Lentil Curry from The Fire Nation

IMG_20151101_140202

Here are all the spices you’ll need for this Fire Nation favorite!  The bag in front contains one of the hottest peppers known to the Fire Nation: The Trinidad Scorpion Butch-T!  For those like me, who have Fire Nation blood running through their veins, use 1/8th of a dried Fire Nation pepper (with 1/8 of the seeds included as well).  For those who don’t like it quite so hot, use one regular Asian dried hot pepper pod, or 1/4 tsp of cayenne pepper.

Ingredients:

  • 1 TBSP Sesame or Olive Oil.
  • 1/2 of a large onion, cubed
  • 4 cloves of garlic, diced
  • 1 inch cube of fresh garlic, grated (about 2 TBSP fresh grated garlic)
  • 1 cup of red lentils
  • 2 tsp cumin
  • 2 tsp coriander
  • 1 tsp turmeric
  • 1/2 tsp cinnamon
  • 1/2 tsp cardamom
  • I dried hot Asian pepper, crushed.
  • salt & pepper to taste
  • 4 cups vegetable broth
  • 2 TBSP Tomato Paste

Make the Curry!

In a large skillet, cook the onions, garlic, and ginger in the oil over medium-high heat, stirring occasionally.  Cook until the onions become transparent.


IMG_20151101_140529 IMG_20151101_141328 IMG_20151101_141432

Add the lentils and still well so they absorb the oil.  Add all of the spices and stir again.  Add the vegetable broth, and, you guessed it, stir again.

Bring to  a low boil, then cover the skillet and simmer for 20 minutes.  After 20 minutes remove the lid and stir in the tomato paste.  This part can be very tricky, the tomato paste is thick and takes some whisking to to mix into your curry.  I find that stirring fast but lightly, with the spoon never touching the bottom of the pan works best.  If your curry is too soupy,continue to cook uncovered for up to an hour.

IMG_20151101_144543

When the curry is the thickness you like, serve it in a bowl.  It goes well with rice, but I really enjoy scooping up the dahl with pieces of flatbread (like pita or naan).  Enjoy!

Poutine

Poutine, a favorite of the Northern Water Tribe.  Three simple ingredients comprise this comfort food: fries, gravy, and cheese.  Here’s a version of poutine that even Airbender monks can enjoy.

Step 1: Make the mushroom gravy

Ingredients:

  • 1 medium onion, diced
  • 10 – 15 fresh mushrooms, diced
  • 2 cloves of garlic, diced
  • 2 cups vegetable broth
  • 1/2 tsp sage
  • 1 tsp Mirin
  • 1 TBSP soy sauce
  • 2 TBSP flour
  • 1/4 cup soymilk

Heat 1 -2 TBSP of vegetable oil in a skillet over medium high heat.  Add the diced onions and cook until the onions are transparent.  Add the mushrooms and garlic and fry for a few more minutes.

Add The vegetable broth, Mirin, soy sauce, and sage to the skillet and stir well.

IMG_20150725_154210

In a small bowl mix the flour and soymilk together.  When it’s well blended add to the skillet and stir into the mixture to thicken it.

IMG_20150725_153947Continue cooking the gravy over medium heat until it’s at the consistency you like.  I like it to not be watery, and it took me about half an hour to cook the gravy down until it was ready.

IMG_20150725_164849

Step 2: Make the fries

Ingredients:

  • 6-7 medium potatoes
  • 2 TBSP Vegetable Oil
  • 1 TBSP Apple Cider Vinegar

Preheat the oven to 450.  Cut the potatoes into slices then cut those slices into fries, whatever thickness you like. In a large mixing bowl mix together the Oil and Vinegar.  Add the fries to the bowl and toss until every fry is coated in the oil/vinegar mixture.

Arrange the fries evenly on greased baking sheets.  Bake for 15 minutes, then flip the fries over and bake an additional 15 minutes.


Step 3: Make the poutine:

additional ingredient:

Daiya Cheese shreds

Line the bottom of greased casserole dishes or meatloaf pans with the french fries.  Pour the gravy over the fries, then top with a handful or two of Daiya cheese shreds.Bake for an additional 10 minutes, serve and enjoy.

Cauliflower Cheese

A  Earth-Kingom favorite, especially amongst fans of the sports “Redemption” and “Earth Soccer”.   So Simple, yet so tasty!

Ingredients:

  • 1 head of cauliflower
  • 1 1/3 cups soymilk
  • 1 package “Daiya” brand vegan Mozzerella shreds.
  • 3 1/2 TBSP vegan margarine
  • 3 TBSP whole wheat flour
  • T.V.P. or Breadcrumbs for the topping
  • 3 tsp yellow mustard
  • 1/2 tsp nutmeg
  • salt and pepper to taste

Preparation:

Preheat Oven to 450

Break the cauliflower into small florets, and place these florets in a large kettle.  The remaining stem pieces are still good too, cut them on a cutting board and add them to the kettle as well,

Add water to the kettle until you see all the cauliflower starting to float.  Cover the kettle, heat over high  heat and boil the cauliflower for 10 minutes then drain.

In a medium saucepan heat soymilk, margarine, and flour, stirring constantly until the margarine is melted.  Oh yes, you REALLY must stir this a lot or else the flour WILL start clumping up.  Once the margarine is melted it’s time to add in the “cheese”!  Set aside a handful of the cheese (1/4 cup), you’ll need it later.  As for the the rest of the bag, dump the rest (yes empty the bag) into the saucepan and continue stirring and cooking until the cheese has all melted.  You can stir this occasionally now, usually 10 – 15 minutes is sufficient time for the vegan “cheese” to melt.  Once it’s melted stir in the mustard and nutmeg.  Add salt and pepper to taste.

Spray a casserole pan or 2 meatloaf pans with cooking spray.  I like using meatloaf pans myself.  Fill the casserole or the meatloaf pans with the drained, cooked cauliflower.  Cover the cauliflower with the sauce you made in the pan.  Cover the sauce-covered cauliflower with the remaining “cheese” and T.V.P. (or Breadcrumbs).

Bake for 20 minutes.  Enjoy!

IMG_20150506_195200

Quick Essential Module #2 — How to Prepare Tofu for Asian Stir-Fry Dishes

Ah yes, tofu.  As a vegan it’s one of my favorite sources of protein.  When done right tofu is quite magnificent, and that magnificence all comes down to texture.  First and foremost, when you’re buying tofu in the store be sure to buy extra firm tofu.  Yes it really does make a world of difference over the normal “firm” variety.  You also want to press all the water out of your tofu.  Before I owned a tofu press, I’d sandwhich the tofu between two plates (placed in a sink) and put a 5 lb weight on top of the top plate.  You can also use a heavy cookbook or a large, heavy can (or jar) of food.  Or you can purchase a kickass, take no prisoners tofu maker and tofu press like I did.  Or a more modest one, whatever suits you.  The key is to get the water out, you want to press your tofu for at least 20 minutes, up to an hour.  The more water you press out, the less time you’ll have to spend cooking that water off in the wok.

Now that your tofu has had all of its excess liquid water-bended out of it, it’s time to slice the tofu into bite sized slices.  The smaller the pieces, the faster each piece will cook.  The method I’ve found that works best for cutting a block of tofu is as follows.  Cut down the spine of the tofu in thirds.  Lay the tofu flat, and make horizontal cuts dividing that plane of the tofu in fourths.  Hash-mark this by cutting vertically into fourths.  One more step, we’re going to cut again horizontally each section in half, essentially dividing horizontally into eighths.  It’s easier to get a feel for what I mean by looking at the pictures below:

And now for the tedious part.  Toss all these pieces of tofu into a wok and dry-fry over high heat.  That’s right, don’t use any oil, we’re gonna fry these suckers right in the pan all by themselves.  Ideally you want to fry all six sides of each “cube” of tofu until it’s golden-brown and crispy.  This can be a pain in the butt; it requires mindfully and meticulously flipping each piece of tofu so that a white side that was up faces the bottom of the wok, so that it too can get fried.  I eat a lot of stir fry dishes, and I’ve found in every one of these dishes that the perfect texture tofu always comes from cooking the tofu first, and then adding this pre-cooked tofu into the dish at some point during the cooking.  There’s really no other way to get both that golden crispy tofu texture and at the same time take on the flavor of the ingredients around the tofu.  You also have the added bonus that you’re not frying the tofu in any oil.  Veggies need to fry in oil.  Tofu is the opposite.  Your tofu should come out looking something like this:

IMG_20141109_182053

Congratulations, this is the starting point for any stir-fry using tofu.  This is the required prep-work before the real fun of veggie-bending stir-fry begins.

Mexican Lasagne, a Fire-Nation Favorite

I’m revealing one of my true specialties here that I frequently take to potlucks.  This Mexican Lasagne is always a hit.  I’ve adapted the recipe a bit from an old Trader Vic’s cookbook from the 1960s.  There was a recipe for “Chilaquilla Pie” that called for some exotic ingredients like “Tilamook Chihuahua Cheese” and sliced radishes.  I suppose radishes aren’t all THAT exotic, but they’re mainly for garnish and I rarely use them.

I call this a “Lasagne” because like a traditional Italian Lasagne, this is a layered dish.  Instead of using noodles, we’ll be using fried pieces of flour tortillas.  And the filling of course will be seasoned in a Tex/Mex fashion as well, each layer topped generously with a layer of vegan cheese (I mostly use Daiya Mozzarella shreds).  Get ready for your tastebuds to salsa-dance like they were at a wild fiesta, this one is a crowd-pleaser that will please you as well.

Mexican Lasagne:

Ingredients:

  • 2 TBSP vegetable oil
  • 2 small onions (or 1 large onion), diced
  • 1 green pepper, diced
  • (optional) mushrooms, diced
  • 1 package of Vegan ground beef (or make it yourself from T.V.P.)
  • 1 1/2 – 2 TBSP Taco Seasoning
  • Hot Sauce or Salsa (I used a Tarder Joe’s hot sauce)
  • 8oz frozen corn
  • 6 8-inch round flour tortillas
  • vegan shredded cheese
  • (optional) sliced radishes, sliced green onion, and coriander for garnish

Directions:

Preheat oven to 350.  Heat oil in a large wok or skillet over medium heat.  Add onions, peppers, and any other optional veggies you’d like to add.  Fry in the oil until the onions become translucent.  Add the vegan ground beef and fry for a few minutes, stirring occasionally.  Add the taco seasoning and a few splashes of hot sauce or a few spoonfuls of salsa, just enough to give the mixture a little wetness to it.  Add the frozen corn, and stir it into the mixture.  Turn the heat down to low and cover your wok or skillet.

The fun part begins while you let your wok simmer.  On a separate skillet it’s time to fry up some tortillas!  Fry each tortilla on both sides over medium-high heat.  You want the side frying to just get golden, but you don’t want to to cook so long it gets medium to dark brown.  You’ll also notice when you flip the tortilla over to fry it on the second side the tortilla will puff up.  Not to worry, this is normal, and looks really cool when it happens.  Once your tortilla is fried, set it on a plate and start frying another tortilla.  The tortilla on the plate will be hot so give it a few minutes before you attack it with a set of kitchen scissors.  Cut the tortilla into strips, and then cut horizontally along those strips to “dice” your tortillas into small squares.  Arrange these tortilla pieces in the bottom of a greased casserole type pan.  We’ll start off the Lasagne with a double layer of tortilla chips:

Turn the heat off on the wok and divide the filling into two equal halves.  Evenly distribute one of those halves of tasty meatless filling over the double layer of tortilla chips.  Cover the meatless filling generously with vegan cheese.  Looks tasty, but we’re not ready to bake it yet, time for the second layer.  Lay down another double layer of tortilla pieces.  Top with the remainder of the meatless filling and another heaping layer of vegan cheese (I used a whole bag of Daiya shreds on this recipe alone).

Cover the top of your casserole dish with aluminum foil.  We’re going to bake the Lasagne for 20 minutes, but there’s a catch, so pay attention young grasshopper!  The first 15 minutes bake with the aluminum foil on.  After 15 minutes remove the aluminum foil and let the Lasagne bake uncovered for the final five minutes.  Garnish with sliced radishes, green onions, and a sprinkle of coriander if you so choose.  Or just eat it right out of the oven, plain.  Great for parties, potlucks, or when you want to treat yourself to a wonderful dinner at home.

IMG_20141110_192956